Introduction
Thank you for purchase!
This is documentation for "Burgos - Street Food WordPress Theme". Documentation consists of sections. Every section explains specific part of theme or functionality. List of sections is in left side of screen.
- If you are new to WordPress, it is recommended to read official WordPress documentation first.
- Please read theme documentation and follow instructions for demo theme content setup.
- Use search (ctrl+f keyboard shortcut) to find words on page.
- If you have questions please send message here using account that you purchased theme with to confirm purchase.
- Before asking for support please read more about general support for themes and item support policy.
Demo theme content setup
Watch the setup video - theme demo setup video
Steps for demo theme content setup
1.Unzip main.zip file that you downloaded from Themeforest, find „burgos.zip“ and upload it to WordPress dashboard.
2.
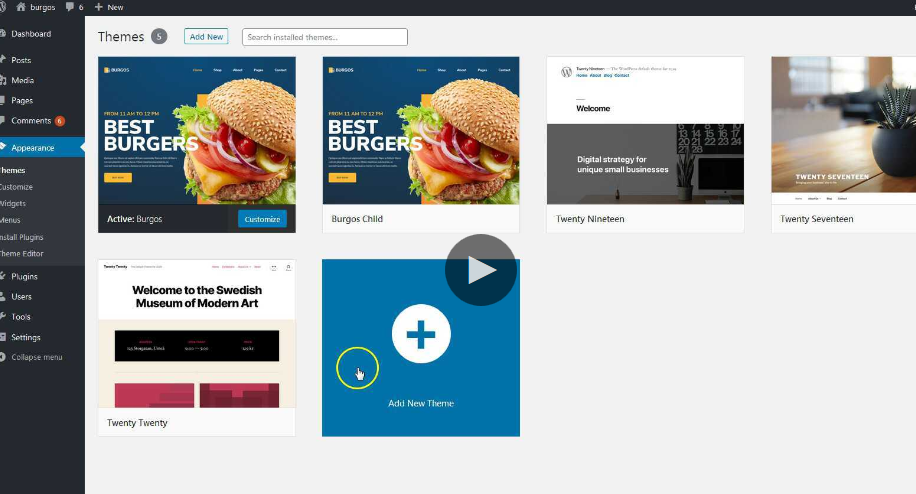
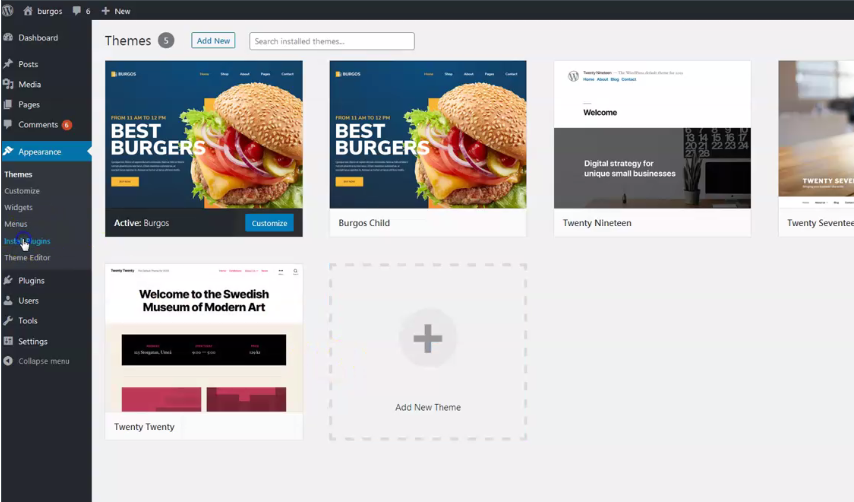
In WordPress dashboard go to appearance/themes and activate theme „Burgos“.
3.
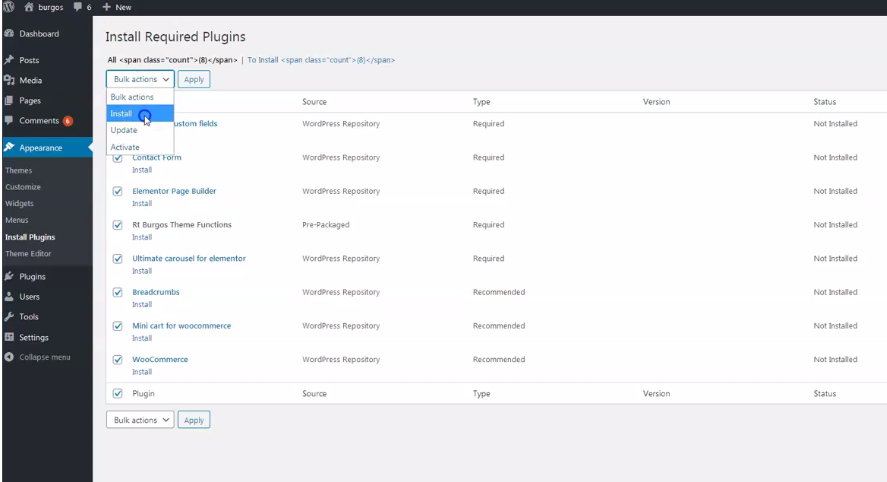
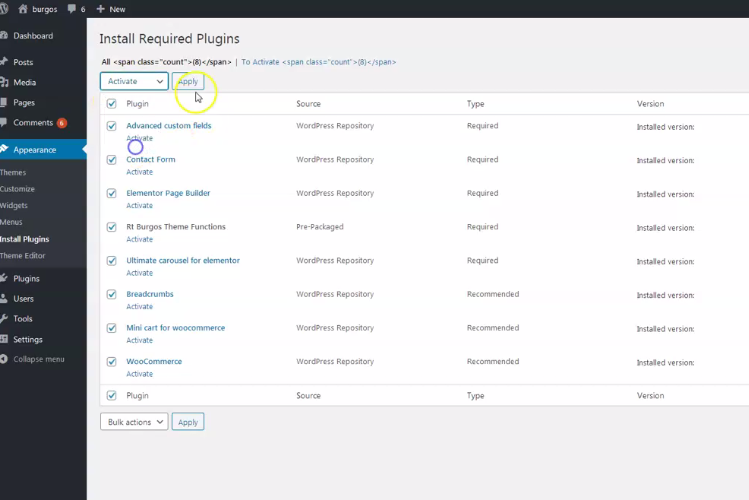
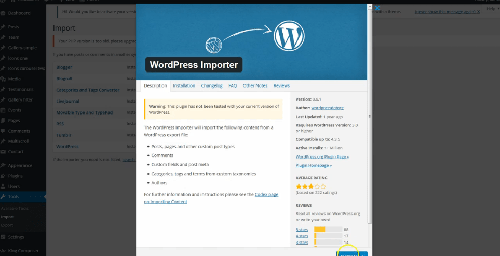
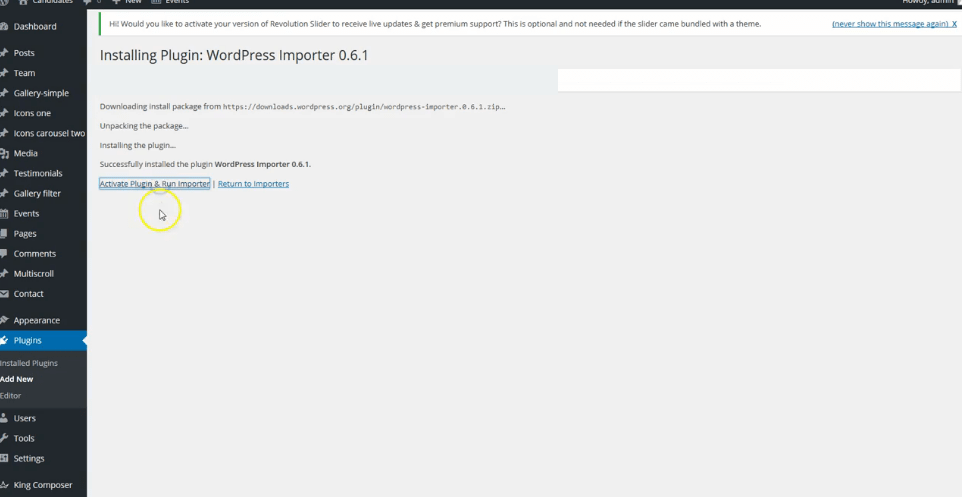
Install and activate all recommended and required theme’s plugins
4.
Go to tools/import and import demo-all.xml file. NOTICE: depends of your hosting, this may require to increase maximum file upload size (ask hosting provider for help). Another option is to import demo parts xml files instead.
Demo parts filess are in "main_file.zip/demo_content/demo-elements" folder.


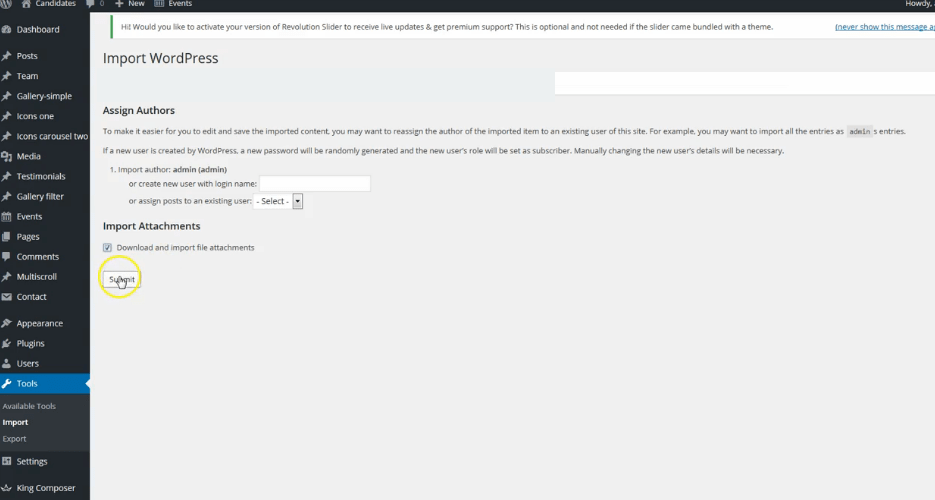
Be sure to replace demo images with yours images or purchase license for demo images. That is explained in theme description on Themeforest.
5.
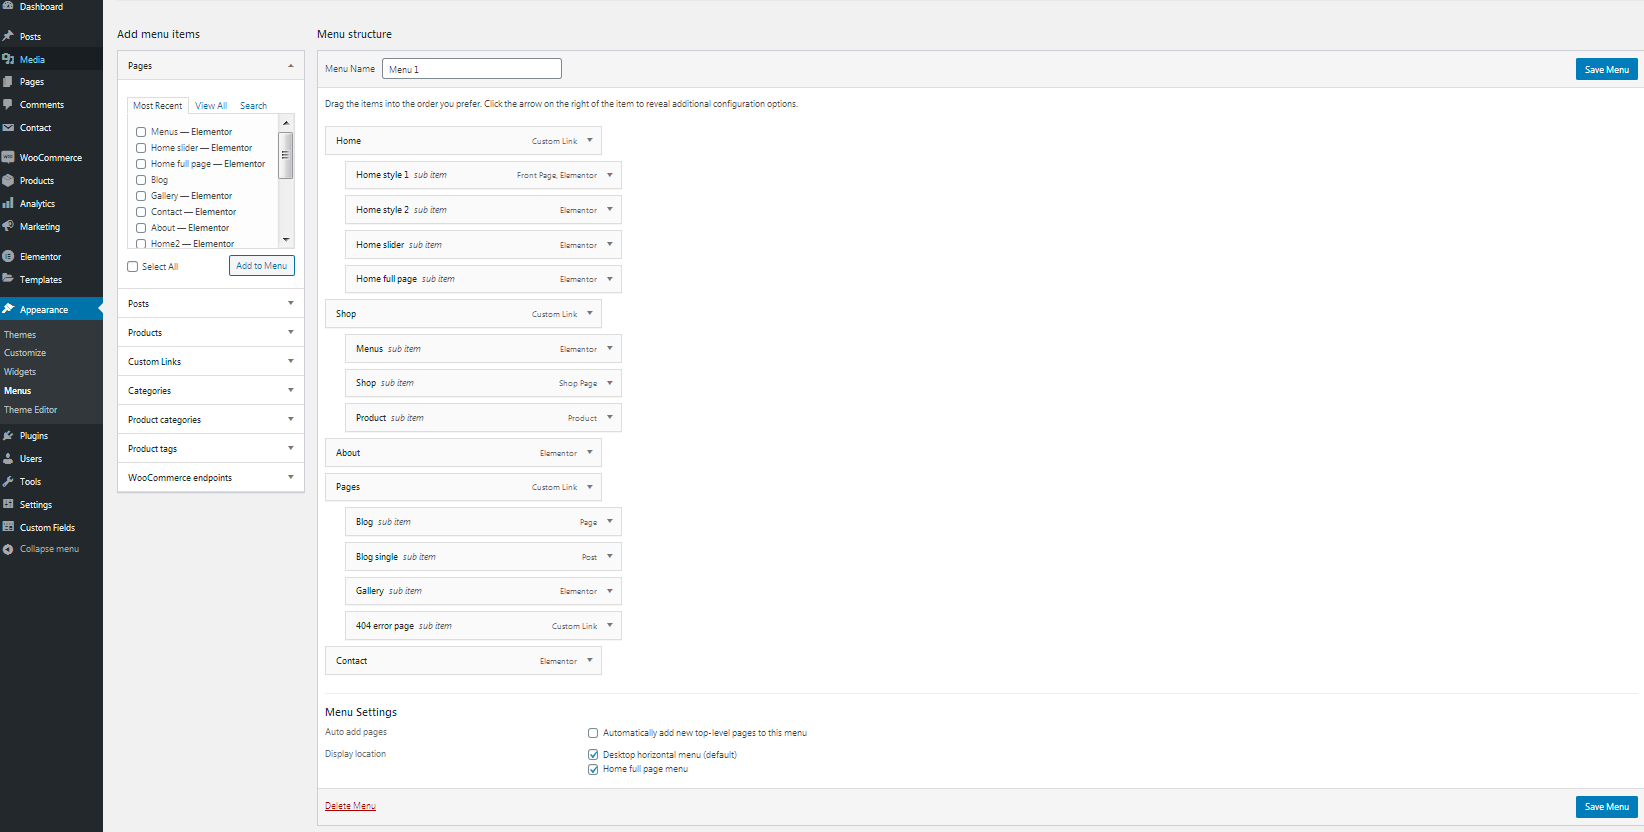
Go to appearance/menus and set demo content menus.
If you imported full demo content then you will have alredy "Menu 1" - theme demo menu (you can create new menus if needed). Mark the location for it in "Display location". This theme has two menu locations: "Desktop horizontal menu" as main default menu location and "Home full page menu" for "Home full page" page template.
6.
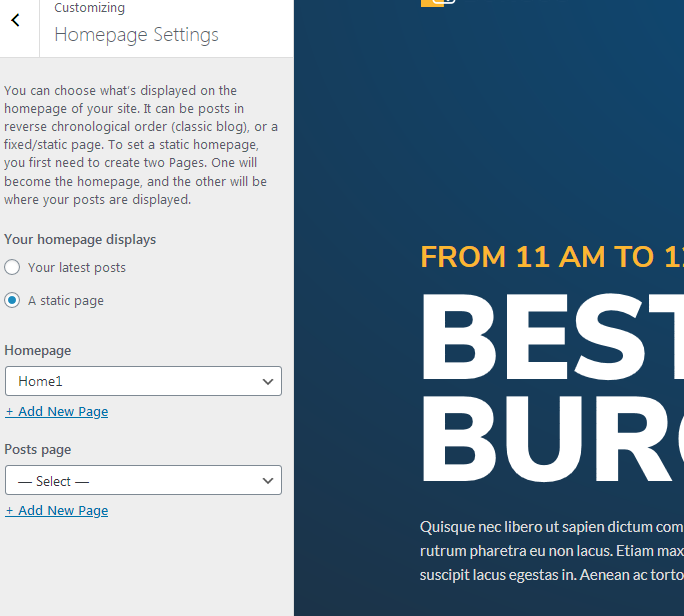
Go to Customizer - appearance/customize/homepage settings and set static page (front page) for home page
Set other theme options as well. More about theme options you can read in section "theme options".
7.
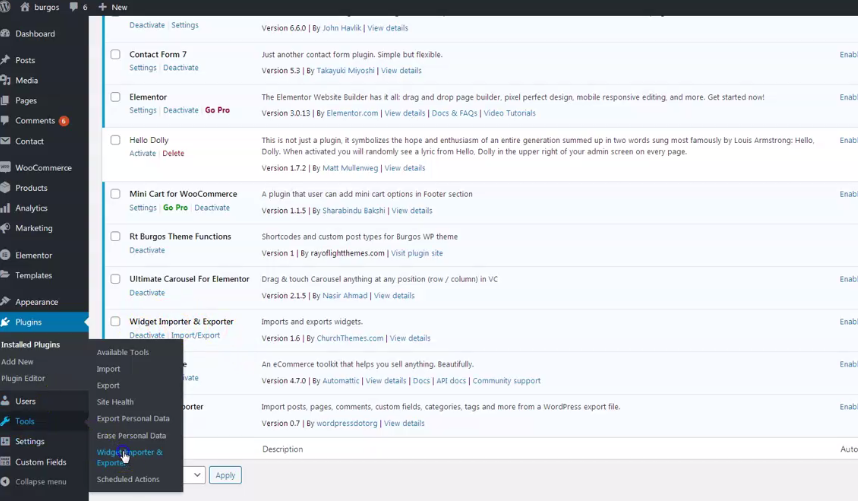
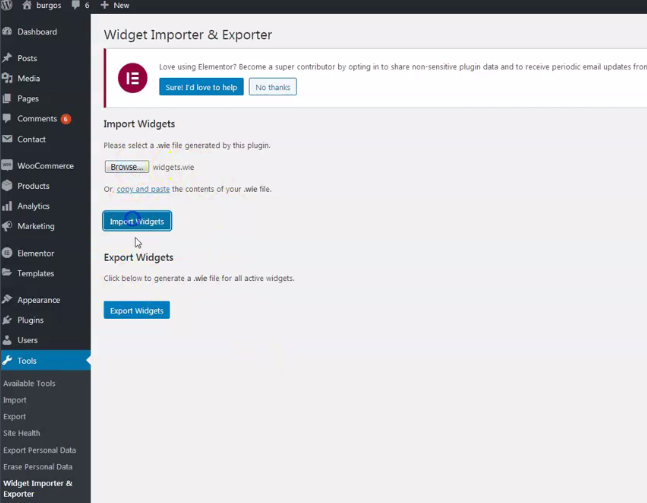
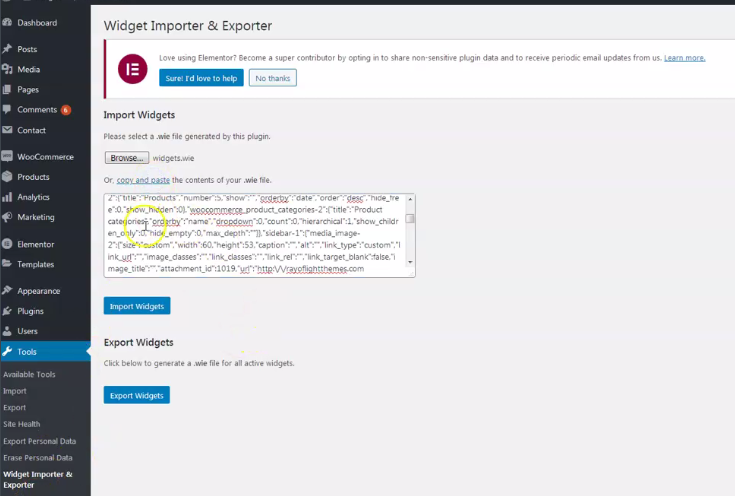
Import theme demo widgets. Instal and activate this plugin: Widget importer & Exporter and import widget.wie file. Widget.wie file is in demo-content folder.
Basic installation is finished. For more details and functionalities please see sections list in left side of screen and continue reading.
Elementor page builder plugin
This theme is built with Elementor page builder plugin. Official plugin page Theme has custom Elementor widgets with "burger" icon.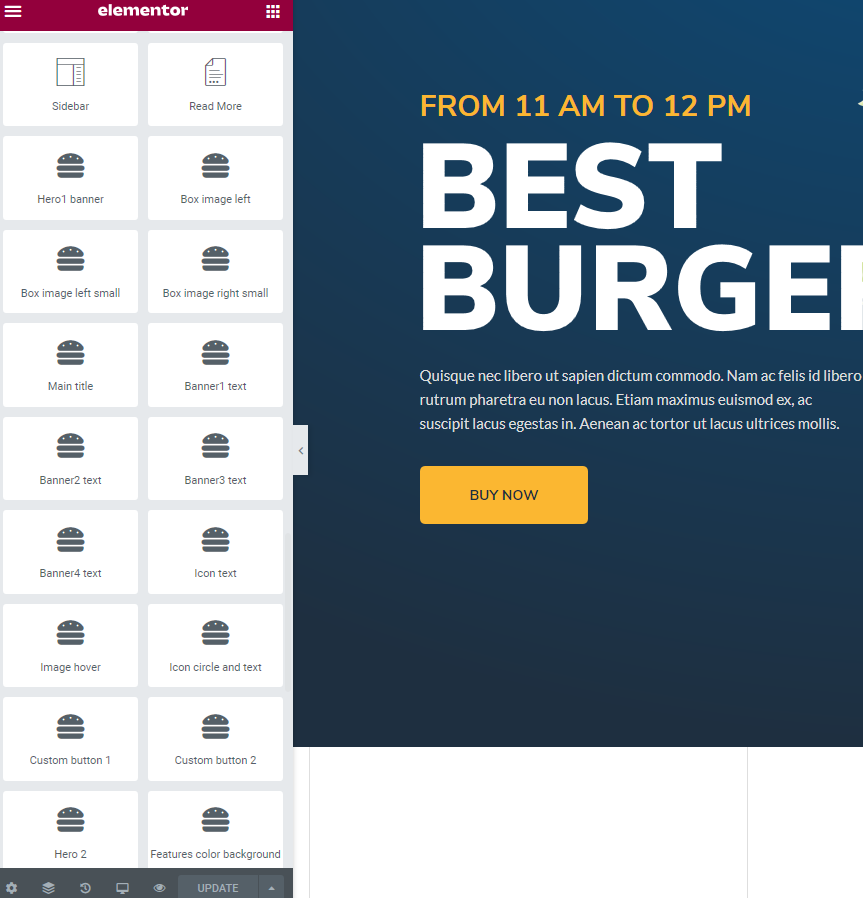
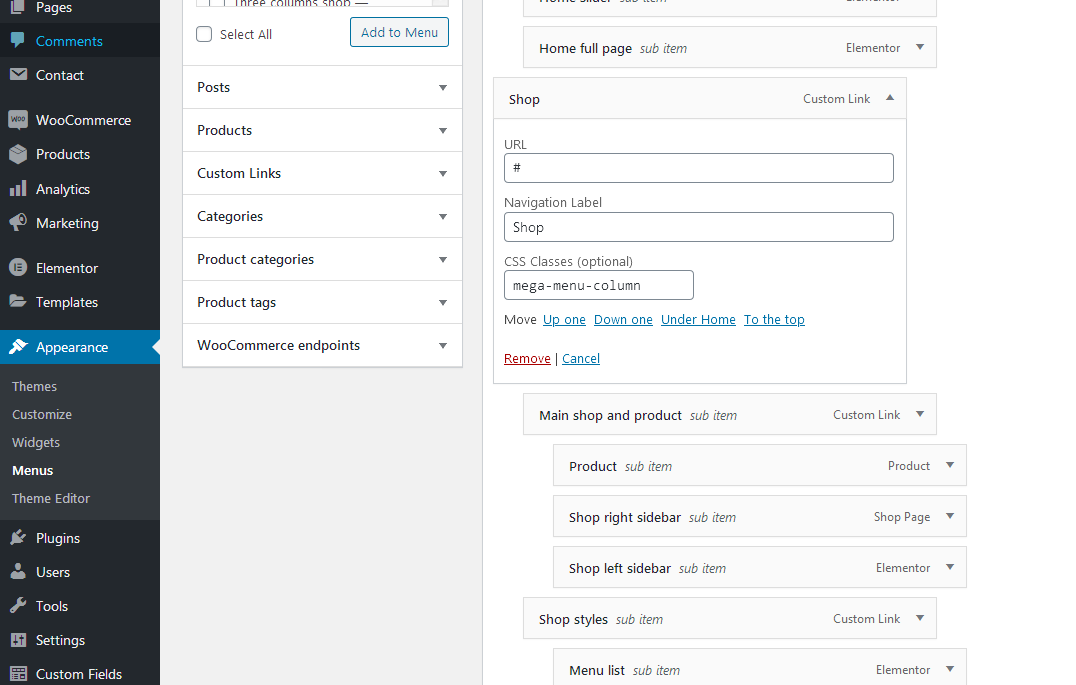
Menus
Theme has 2 custom menu locations. "Desktop horizontal menu" as main default menu location and "Home full page menu" for menu location in "Home full page" page template."Menu 1" imported with demo content is theme demo menu (you can add new menus if needed). Set the location for the Menu 1 in "Display location".
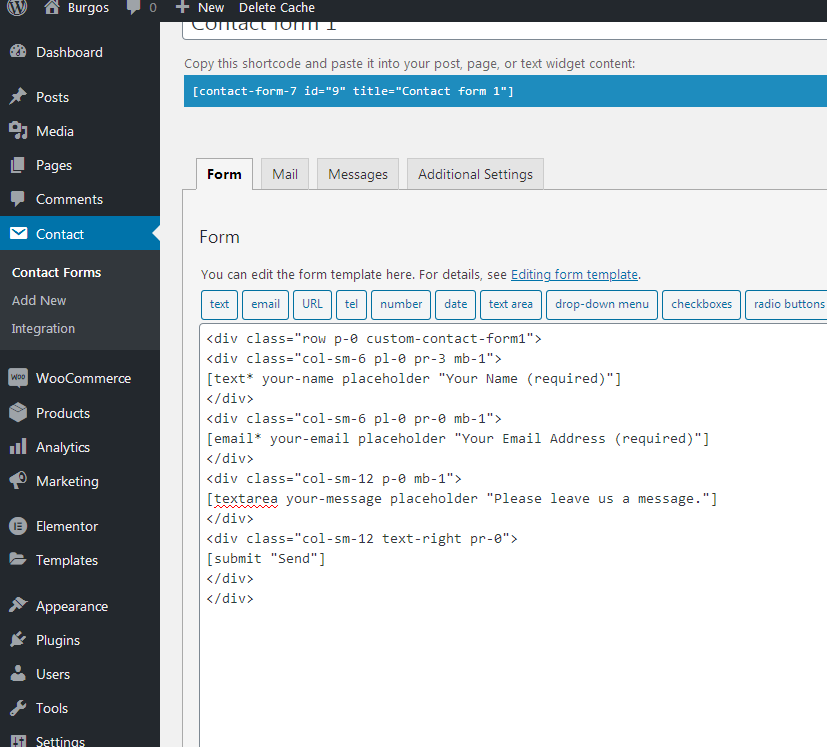
Contact form
Everything related to contact is made with Contact form 7 plugin. Official plugin page.This is code for contact form styling:
<div class="row p-0 custom-contact-form1">
<div class="col-sm-6 pl-0 pr-3 mb-1">
[text* your-name placeholder "Your Name (required)"]
</div>
<div class="col-sm-6 pl-0 pr-0 mb-1">
[email* your-email placeholder "Your Email Address (required)"]
</div>
<div class="col-sm-12 p-0 mb-1">
[textarea your-message placeholder "Please leave us a message."]
</div>
<div class="col-sm-12 pl-0">
[submit "Send"]
</div>
</div>
Pages and page templates
Pages have few custom options:1. Background image (works only if page template with title is set),
2. Page subtitle (works only if page template with title is set),
3. Option to chose menu style - default and second menu style. Second menu appears in home1 and home2 in demo website.
4. body_class page fiel for adding classes for body tag. It should be already imported with demo.xml
file. For more info read this.
If you want vertical lines to appear in page, add text "lines" as body class.
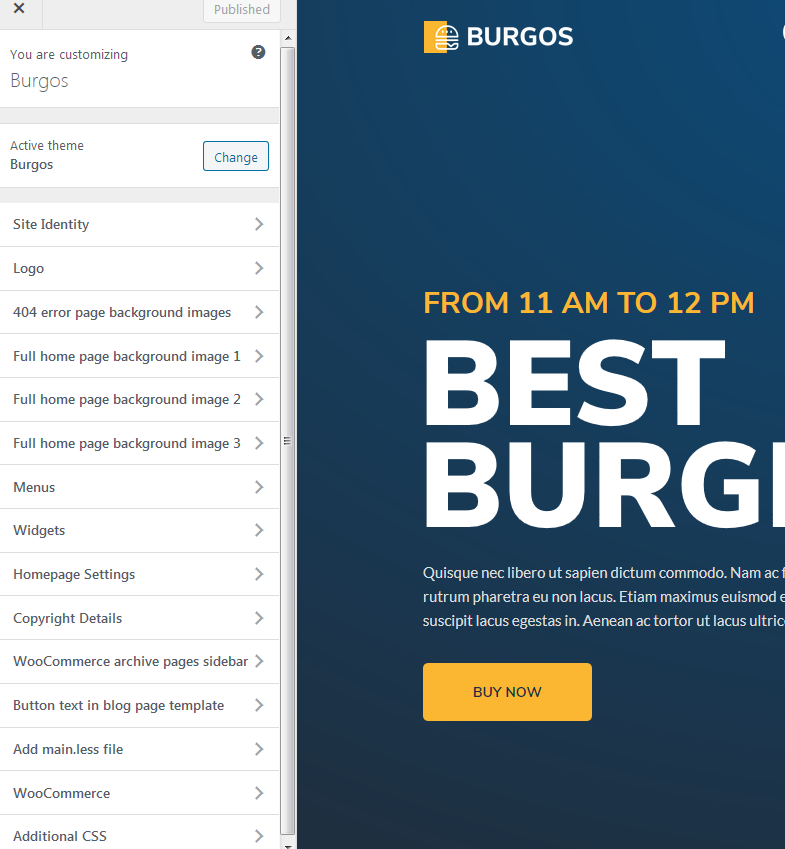
Customizer theme options
Theme options are in appearance/customize. Options for logo, background images, full home page background image1 (this is for home full page images), copyright, options to add/removed sidebar in WooCommerce pages, button text in blog page template, add/remove main.less file (if you want to make modification in .less file, default is main.css file. Recommended for child theme customization).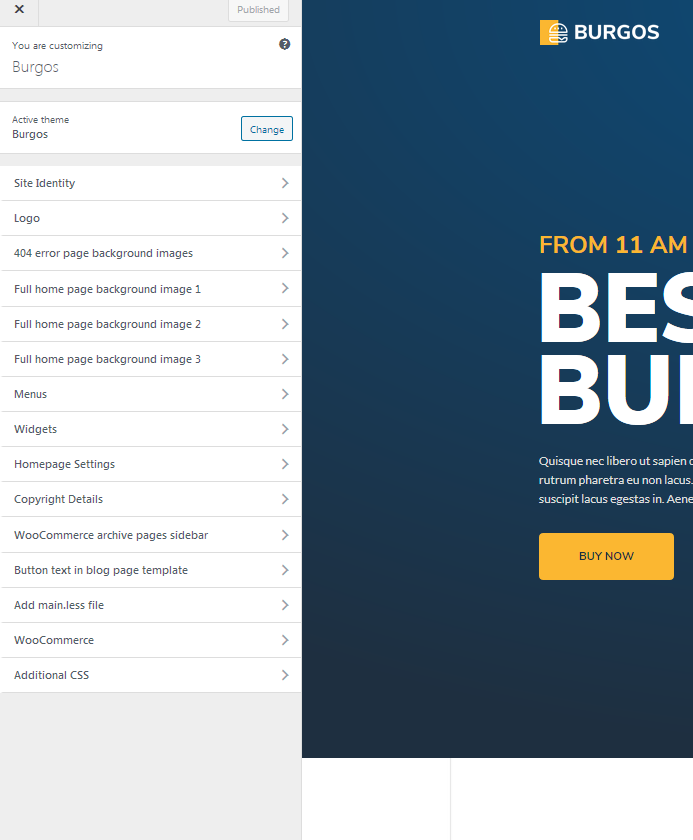
Shortcodes
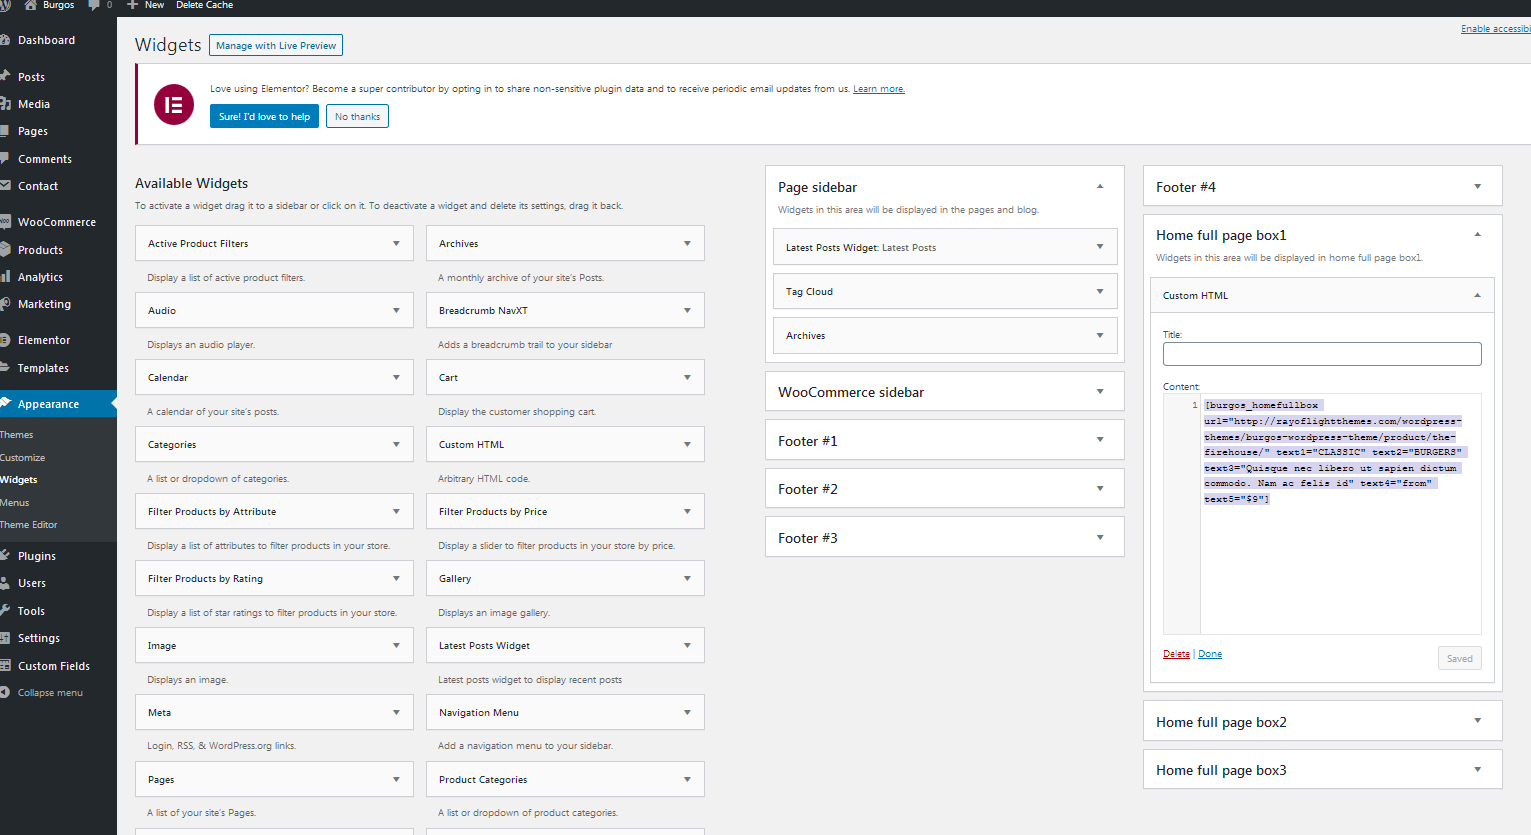
1. Custom shortcode for text in "home full page". Should be added in appearance/widgets/home-full-page-box1 (2 and 3) widget areas with "custom html" widget. If you imported widgets demo it is already there.
[burgos_homefullbox url="your url" text1="CLASSIC" text2="BURGERS" text3="your text" text4="from" text5="$9"]
2. Custom shortcode for text in slider (depreciated).
[burgos_heroslider text1="chicken burger" text2="your text" buttontext="Buy now" buttonurl="your url"]
How to set testimonials carousel.
3. Shortcode for custom carousel text. Add it in posts in "SA sliders" in dashboard, then copy/paste sliders shortcode anywhere in pages. Official SA sliders (Slide Anything) plugin page: https://wordpress.org/plugins/slide-anything/
[burgos_testimonials text1="your text" text2="name"]
Widgets
- Widgets are default WordPress feature. To open widgets go to appearance/widgets in dashboard. Official WordPress documentation: https://codex.wordpress.org/WordPress_Widgets- Theme has 9 widget areas. The widget areas for "home full page template" are: home full page box1, home full page box2 and home full page box3. In those widget areas should be added a shortcode burgos_homefullbox. Explained more in "shortcodes" section.
How to set slider
Home slider in demo theme is created with Smart Slider 3 plugin. In "demo content" folder in main file downloaded from Themeforest is "banner slider.ss3" file that should be imported in Smart slider settings in dashboard. It's shortcode can be copy/pasted anywhere in pages. If demo is imported it should be already in home slider page. Official slider page: https://wordpress.org/plugins/smart-slider-3/How to set home full page
In page chose "home full screen" template.To set text, open widget areas "appearance/widgets/home full page box1 2 and 3" and add there burgos_homefullbox shortcode with "custom html" widget.
[burgos_homefullbox url="your url" text1="CLASSIC" text2="BURGERS" text3="your text" text4="from" text5="$9"]
More details are in Widgets and Shortcodes sections.
To set background images open appearance/customize/full-home-page-background-image1, 2 and 3 and add images there.
Customizer theme options explained in "customizer theme options" section with more details.
How to set permalinks
- Permalinks are in dashboard/settings/permalinks.- It is recommended to have this permalinks structure (see screenshot):
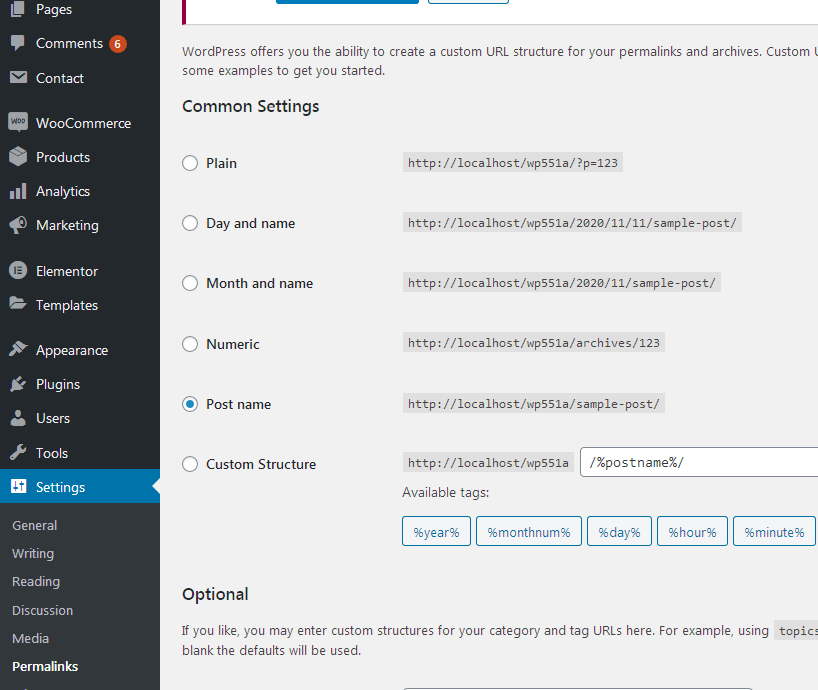
How to reset permalinks?
- Set permalinks to default (plain) and click button "save changes".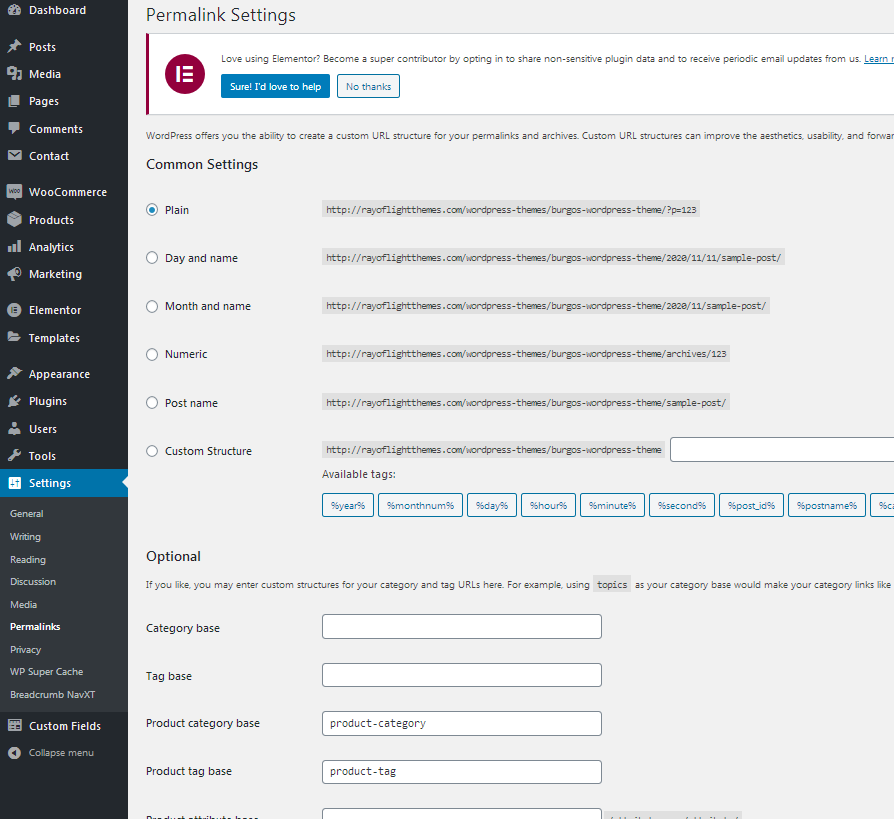
Plugins
Rt Burgos Theme Functions plugin - theme functions and custom post types plugin, bundled with theme.Elementor page bulder plugin. https://wordpress.org/plugins/elementor/
Advanced custom fields plugin. https://wordpress.org/plugins/advanced-custom-fields/
Contact form 7 plugin. https://sr.wordpress.org/plugins/contact-form-7/
SVG support plugin - allows SVG images uploading. (Upload SVG images in media library first.) https://wordpress.org/plugins/svg-support/
Mini cart for WooCommerce plugin. https://wordpress.org/plugins/mini-cart-for-woocommerce/
Breadcrumbs plugin. https://wordpress.org/plugins/breadcrumb-navxt/
Smart Slider 3 https://wordpress.org/plugins/smart-slider-3/
Slide Anything https://wordpress.org/plugins/slide-anything/
WooCommerce plugin. https://wordpress.org/plugins/woocommerce/
For post's list widget, this plugin is recommended: Latests post plugin. https://wordpress.org/plugins/latest-posts/
Child theme
- Basic child theme "burgos-child.zip" for this theme is in main_file.zip.- Official WordPress documentation about Child themes: https://codex.wordpress.org/Child_Themes
- It is recommended to activate child theme if you make code customizations and to copy/paste all files from parent theme with code custom changes in child theme.
How to change color
- It is recommended to use child theme and style.less file to change color.Steps for color change
a) Activate Child theme.b) Install and activate this plugin: https://sr.wordpress.org/plugins/lessify-wp/.
c) Go to "appearance/customize/add main.less file" and mark the second checkbox "add style.less file" (this will add style.less file in theme).
d) Open style.less file from child theme in your hosting C-panel or via FTP.
e) In that file find HEX code for color (it's in top of file) and replace it with HEX code for color you want to have on site.
f) Save changes. New color should appear on site.
g) You can leave it that way and continue using the theme if you're more comfortable that way (you don't like to work with code) or (that is recommended) go to one of less-to-css online compilers like: http://less2css.org/ and copy in that all code from child theme style.less file, paste into editor and convert into css code. Then, open child theme style.css file and copy/paste converted css code from compiler into it. After this, lessify plugin should be deactivated and style.less file removed from site in "appearance/customize/add main.less file".
- There will probably be parts of site where color is added via page builder element so it will need to be changed manually in that page builder element.
- To find HEX value for color you can use Photoshop or other software for graphic or take a look at this online color picker: http://www.w3schools.com/tags/ref_colorpicker.asp
- In theme demo site, colors assigned to these color variables are: @first-color: #fbb731;
@second-color: #0C4C7B;
@third-color: #F37335;
@fourth-color: #1B2A49;
@radial-gradient1: radial-gradient(100% 100% at 50% 0%, #365368 0%, #1E2F40 100%);
@radial-gradient2: radial-gradient(100% 100% at 50% 0%, #0C4C7B 0%, #1E2F40 100%);
@linear-gradient1: linear-gradient(2.42deg, #F37335 -19.6%, #FBB731 100.79%, #FDC830 100.79%);
@linear-gradient2: linear-gradient(340.93deg, rgba(243, 115, 53, 0.8) 9.44%, rgba(251, 183, 49, 0.8) 101.32%, rgba(253, 200, 48, 0.8) 101.32%);
@first-color-transparent: rgba(251, 183, 49, 0.9);
- to change HEX code to RGBA code go to this site: http://hex2rgba.devoth.com/
Theme translation
Theme has pot file included, that means text strings in dashboard can be translated. Activate translation plugin (can use Polylang). https://wordpress.org/plugins/polylang/ Check if "languages" tab in settings appears. In theme folder "languages" default pot file is included. To translate text strings in theme, please rename burgos.pot file to "language code" for language you want to translate in, for example if you translate to Portugales language code is "pt_BR" so burgos.pot should be renamed to "pt_BR.po". Then open the file with Poedit and translate text strings. http://poedit.net/ More details about WordPress translation here :http://codex.wordpress.org/WordPress_in_Your_Language http://codex.wordpress.org/Installing_WordPress_in_Your_LanguageHow to reorder posts
- Install and activate this plugin: https://wordpress.org/plugins/post-types-order/- It adds "reorder posts" button for all posts and custom post types and you can manually reorder them.
Favicon
Upload favicon in appearance/customize/site identity/site icon. Official documentation: https://codex.wordpress.org/Creating_a_FaviconSources and credits
TGM plugin activation https://github.com/thomasgriffin/TGM-Plugin-ActivationAll free plugin mentioned above from WordPress respository.
Bootstrap css framework,
Font Awesome font icons,
lightbox.js,
waypoints.js,
Google fonts,
jQuery.js
Demo images credit
Images are not included for download. Images are slightly transformed to fit design. Images and icons credit: http://flaticon.com/ , https://elements.envato.com/
https://elements.envato.com/image-3G4ZH3J https://elements.envato.com/image-P2N635W https://elements.envato.com/image-DC8XRHZ https://elements.envato.com/image-PTESKZ7 https://elements.envato.com/image-ZEJKHRD https://elements.envato.com/image-P7H7WVM https://elements.envato.com/image-UAALRN3 https://elements.envato.com/image-PYFE8X3 https://elements.envato.com/image-7YFZRU8 https://elements.envato.com/image-XPREN7U https://elements.envato.com/image-PLH58L2 https://elements.envato.com/image-PVXM9P5 https://elements.envato.com/image-P2SVT2B https://elements.envato.com/image-DY5T8AS https://elements.envato.com/image-N946CV6 https://elements.envato.com/image-P8DCZWP https://elements.envato.com/image-5GF3D8M https://elements.envato.com/image-PBS6P94 https://elements.envato.com/image-PF4HAF6 https://elements.envato.com/image-PGWXELE https://elements.envato.com/image-VZ6PBSW https://elements.envato.com/image-MWSKJN8 https://elements.envato.com/image-PH8MRLG https://elements.envato.com/image-2R8UVK7 https://elements.envato.com/image-3R2XNF7 https://elements.envato.com/image-YXRZZB4 https://elements.envato.com/image-PHFCT8R https://elements.envato.com/image-4BM65XU https://elements.envato.com/image-PNRXLQC https://elements.envato.com/image-92XGQ3N https://elements.envato.com/image-NZK9J2T https://elements.envato.com/image-PBCAQLW https://elements.envato.com/image-DFUBC9J https://elements.envato.com/image-PFV6QZY https://elements.envato.com/image-PHZTD3Y https://elements.envato.com/image-WEEXDEV https://elements.envato.com/image-PCWLD7G https://elements.envato.com/image-JD2DNQB https://elements.envato.com/image-DCRTPXG https://elements.envato.com/image-E859B3N