Introduction
Thank you for purchase!
This is documentation for "Appaira - Digital Marketing WordPress Theme ".
Documentation consists of sections. Every section explains specific part of theme or functionality.
List of sections is in left side of screen.
- If you are new to WordPress, it is recommended to read
official WordPress
documentation first.
- Please read theme documentation and follow instructions for demo theme content setup.
- Use search (ctrl+f keyboard shortcut) to find words on page.
- If you have questions please send message here using account that you purchased theme with to confirm purchase.
- Before asking for support please read more about general support for themes
and item support policy.
Demo theme content setup
Steps for demo theme content setup
1.
Unzip main.zip file that you downloaded from Themeforest, find „appaira.zip“ and upload it to
WordPress dashboard.
2.
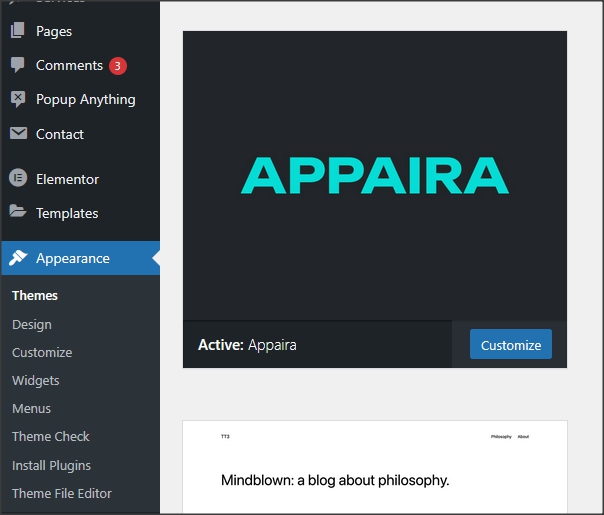
In WordPress dashboard go to appearance/themes and activate theme „Appaira“.
3.
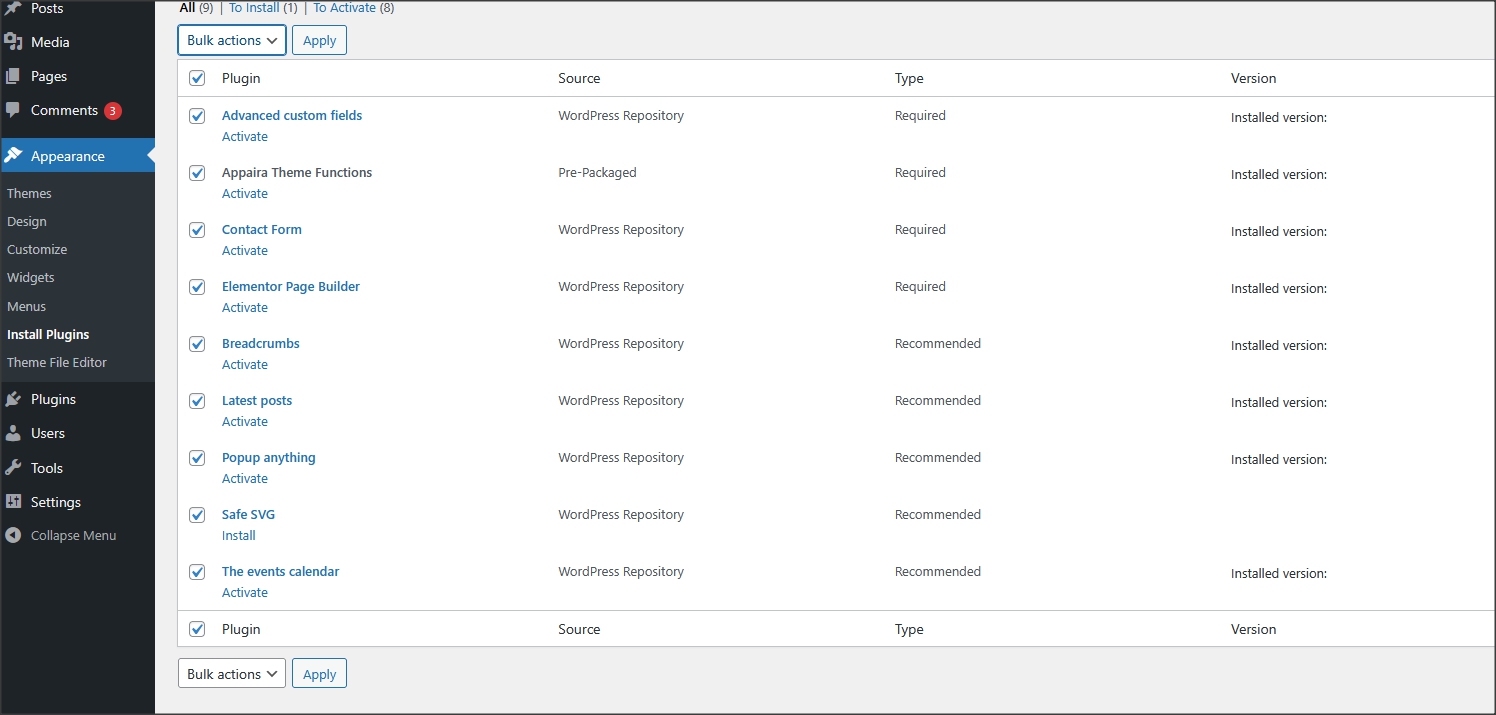
Install and activate all recommended and required theme’s plugins
4.
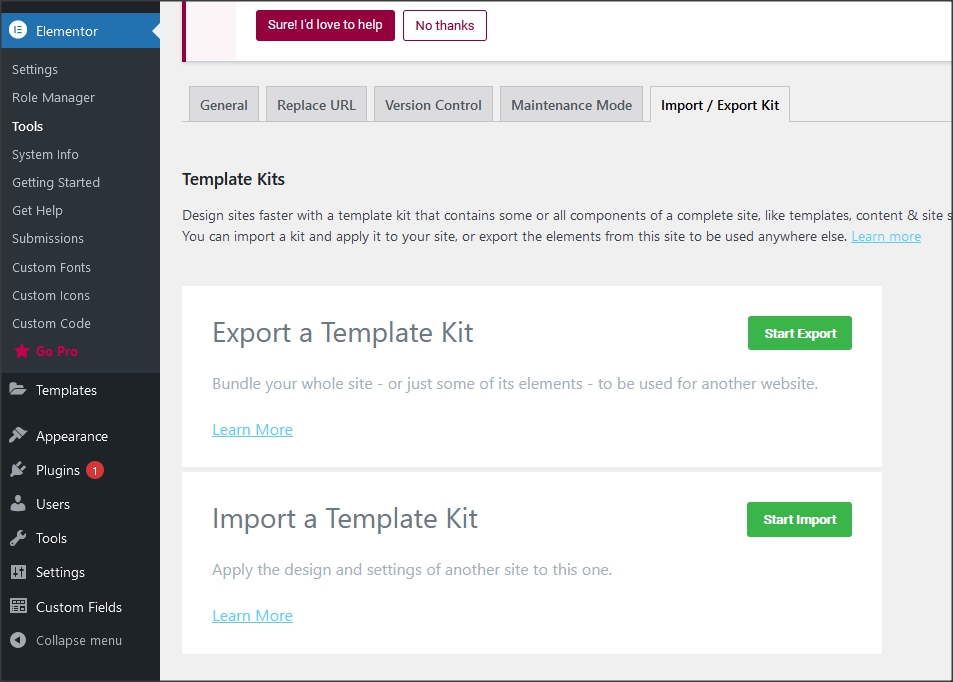
Go to Elementor/Editor/Tools/Website Templates/Import and import elementor-kit.zip file for Elementor page builder custom styles.
Elementor-kit.zip file is in folder "demo-content" inside main zip file you downloaded from Themeforest. Unzip it and find it.
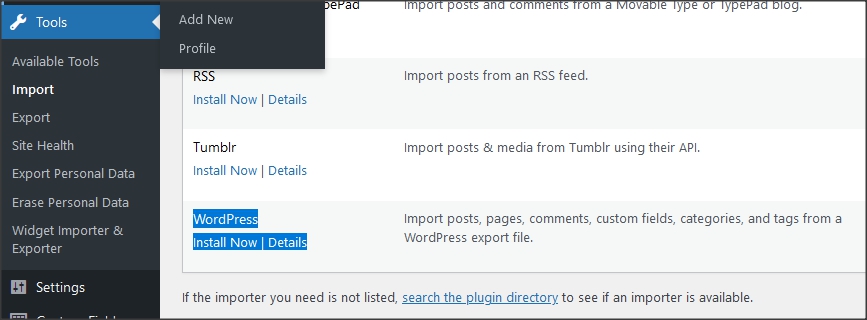
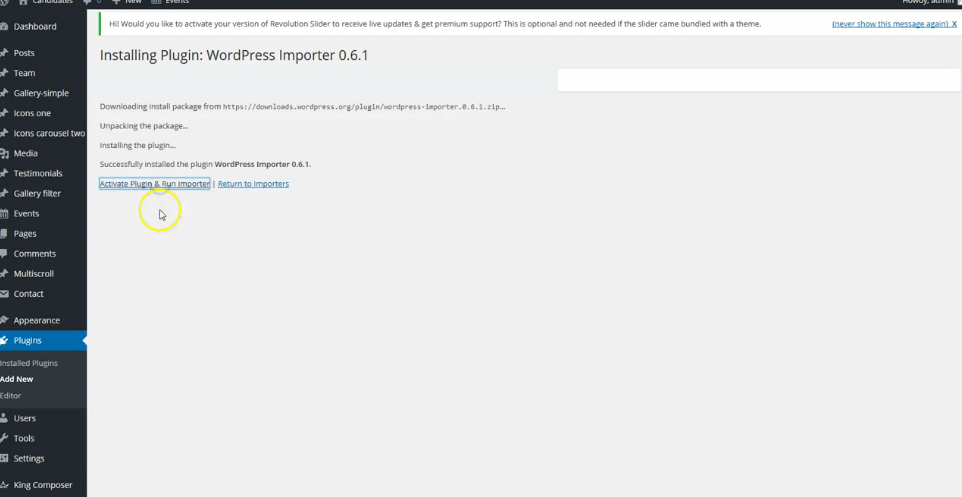
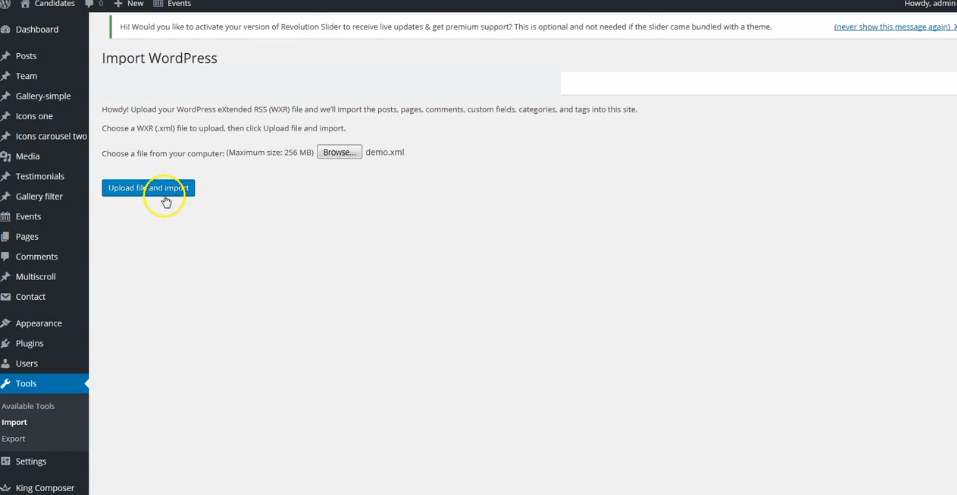
5.
Go to tools/import and import demo.xml file from "demo-content" folder.
"Demo-content" folder is inside main zip file you downloaded from Themeforest.
Be sure to replace demo images with your images or purchase license for demo images.
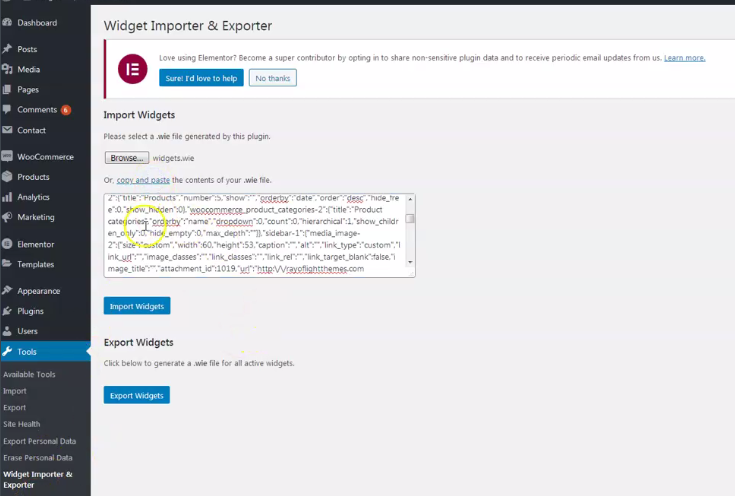
6.
Import theme demo widgets. NOTE: Demo website widgets consist only of links and social icons in footer bottom of page. If you don't need it you may
skip this step and add your own widgets.
If you want theme demo widgets then - Instal and activate this plugin:
Widget importer & Exporter and import widgets.wie file.
Widgets.wie file is in demo-content folder.
If there is problem with file upload, open wigets.wie file with
any text editor, copy content and paste in field as in screenshot below.
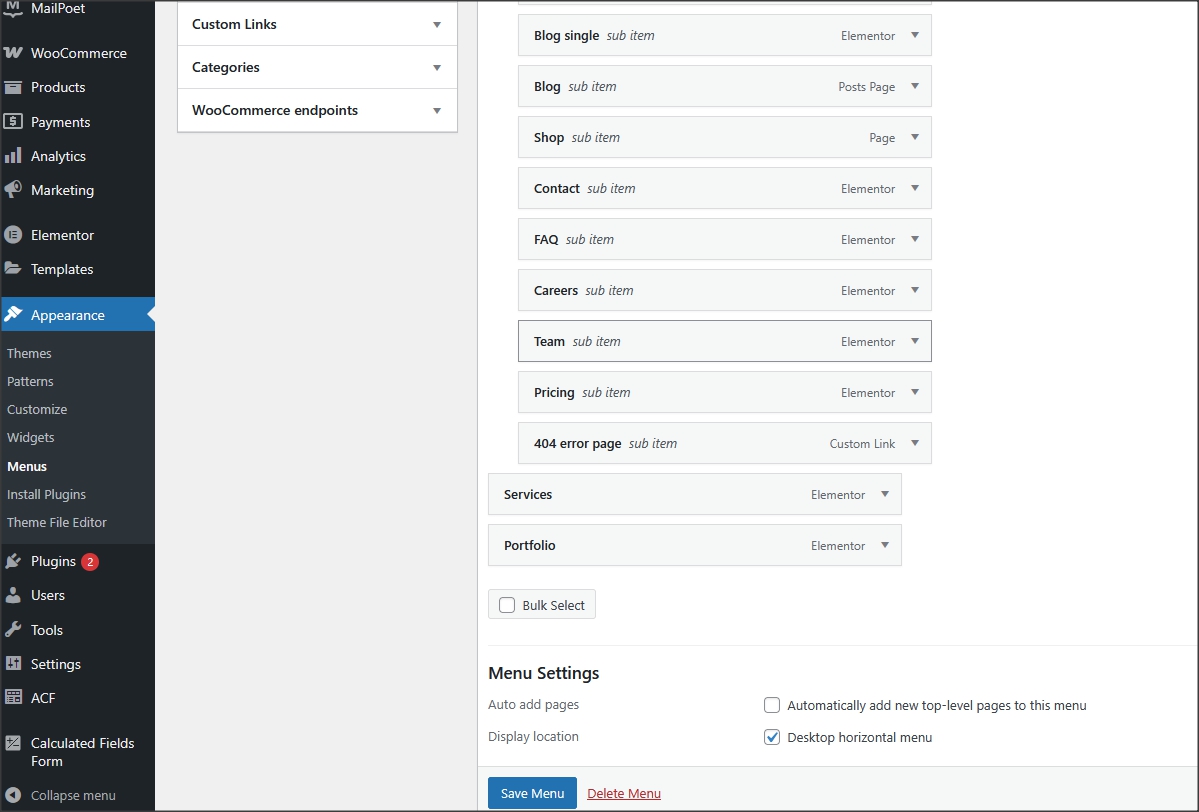
7.
Go to appearance/menus and set demo content menu.
If you imported full demo content then you will already have "Menu 1" - theme demo menu (you can create new menus if needed).
Checkmark the location for it in "Display location".
8.
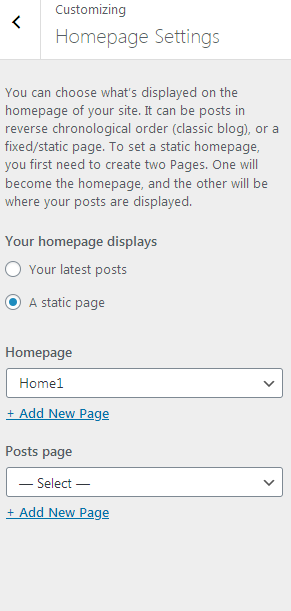
Go to Customizer - "appearance/customize/homepage settings" and set static page (front page) for home page
Set other theme options as well. More about theme options you can read in section "theme options".
9.
Installation is finished. For more details and
functionalities please see sections list in left side of screen and continue reading.
Elementor page builder plugin
This theme is built with Elementor page builder plugin.
Official plugin page
Theme will add custom Elementor widgets.
Menus
Theme has 1 custom menu location.
"Desktop horizontal menu (default)" as main default menu.
"Menu 1" imported with demo content is theme demo menu (you can add new menus if needed).
Checkmark "desktop horizontal menu" location under this menu. After that, menu will appear on demo pages.
Contact form
Everything related to contact is created with Contact form 7 plugin.
Official plugin page.
Contact form is imported with demo content.
Pages and page templates
Pages have few custom page templates. For pages created with Elementor page builder it is
recommended to use "Page full width no title (for pagebuilder)" or "Page full width with breadcrumbs (for pagebuilder)" as page template.
Cases and Services custom post types have two custom page templates: "Post full width no title (for pagebuilder)" and "Post full width with breadcrumbs (for pagebuilder)".
It is recommended to use it if you want to create posts for these custom post types with Elementor.
Customizer theme options
Theme options are in appearance/customize.
Options for logo, sticky menu, background images,
copyright, colors,
menus etc.
Shortcodes
1. Shortcode for social icons:
[rtappaira_socialicon icon="fa-brands fa-facebook-f" url="#"]
Add icon class from here: https://fontawesome.com/v6/search .
Widgets
- Widgets are default WordPress feature. To open widgets go to appearance/widgets in dashboard. Official WordPress documentation:
https://codex.wordpress.org/WordPress_Widgets
- Theme has widget areas that can be found in dashboard/appearance/widgets. In theme setup at top of the page is explained how to import demo widgets.
Custom classes
Classes for adding to Elementor's column or section where widget appears to modify it's style.
These classes are already in demo content.
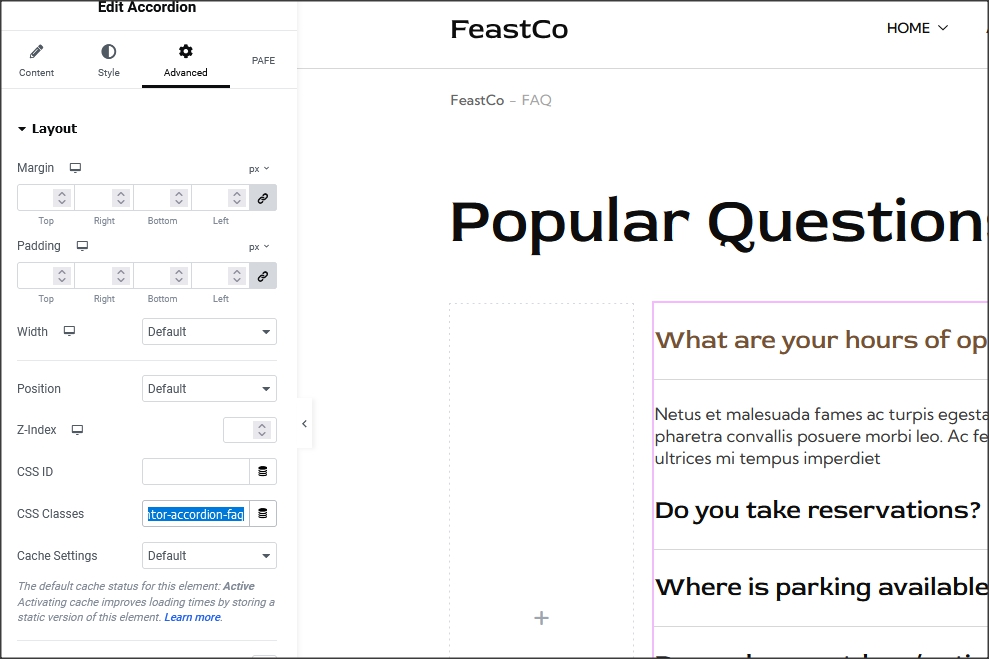
1. "elementor-accordion-faq" - For FAQ custom accordion.
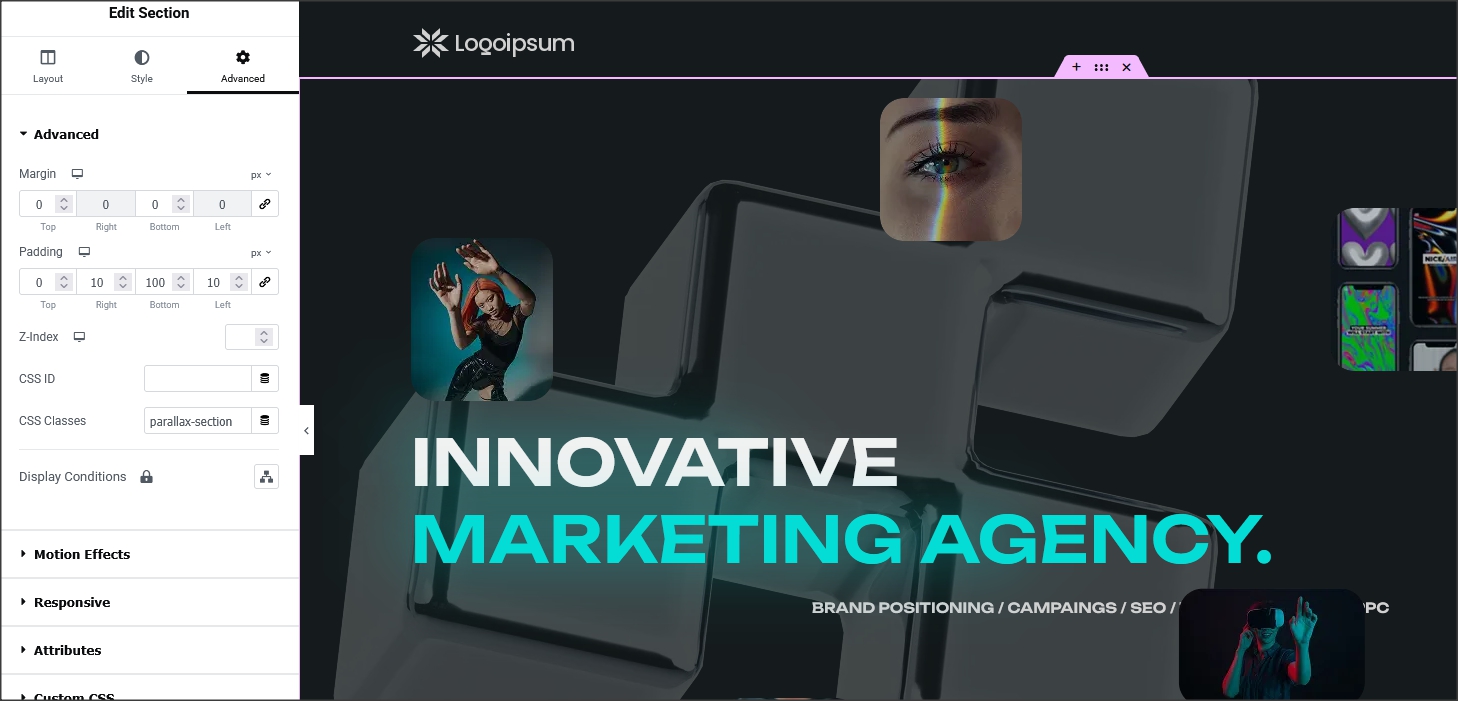
2. "parallax-section" for sections and "parallax-inner1" or "parallax-inner2" for widgets. - For parallax effect inside one section. Add parallax-section class to section where you want
parallax effect to appear and parallax-inner1 or parallax-inner2 class to widgets inside. Example in demo website homepage2 hero image.
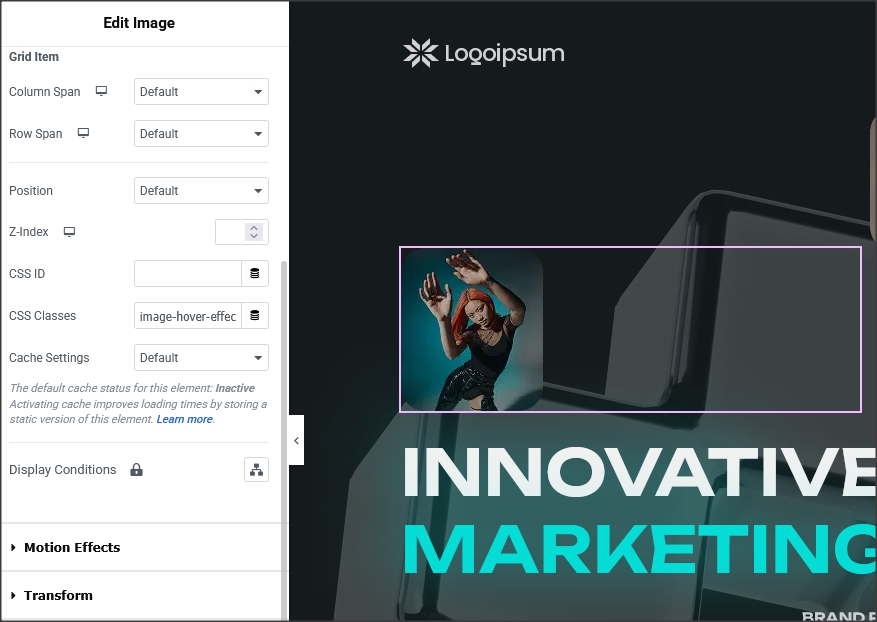
3. "image-hover-effect" for shadow hover effects on images.
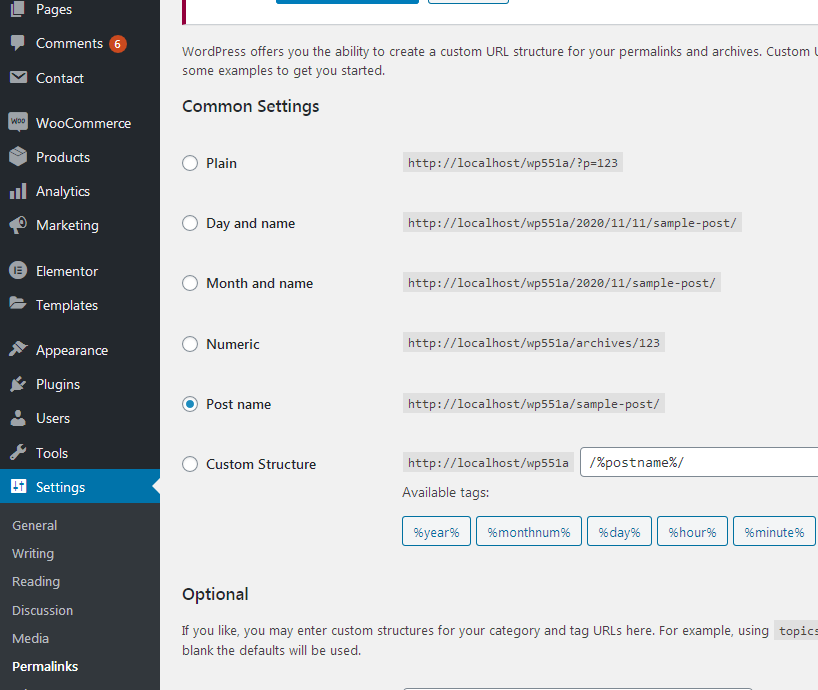
How to set permalinks
- Permalinks are in dashboard/settings/permalinks.
- It is recommended to have this permalinks structure (see screenshot):
- If you get "404 page no found" error when trying to open page or post, after theme switch or plugin deactivation
it is recommended to "reset permalins".
How to reset permalinks?
- Set permalinks to default (plain) and click button "save changes".
- Set permalinks to "post name" and click button "save changes".
- Done.
Child theme
- Child theme "appaira-child.zip" for this theme is in main_file.zip.
- Official WordPress documentation about Child themes: https://codex.wordpress.org/Child_Themes
- It is recommended to activate child theme if you make code customizations and to copy/paste all files from parent theme
with code custom changes in child theme.
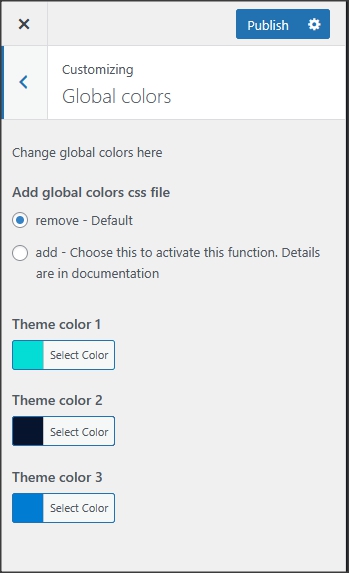
How to change color
Open "Global colors" settings in Customizer, be sure to choose "add" option and then change global theme colors. Colors are unlimited.
It is recommended the color that is added instead of default one has similar lightness and saturation to default color to better fit design.
How to change fonts
1. Fonts can be changed in child theme, requires basic
coding knowledge.
2. Fonts in page builder elements can be changed in Elementor settings.
3. To change fonts for theme without coding try this plugin:
https://wordpress.org/plugins/olympus-google-fonts/
Basic plugin settings can be used to change base and headline theme fonts.
To return theme font's settings to default, set fonts back to default styles and deactivate plugin.
Theme translation
Theme has pot file included, that means text strings in dashboard can be translated.
Activate translation plugin. Can use Polylang.
https://wordpress.org/plugins/polylang/ Check if "languages"
tab in settings appears. In theme folder "languages" default pot file is included. To translate text strings in theme, rename
appaira.pot file to "language code" for language you want
to translate in, for example if you translate to Portugales language code
is "pt_BR" so appaira.pot should be renamed to "pt_BR.po". Then open the file with Poedit and translate text strings. http://poedit.net/
More details about WordPress translation here
:http://codex.wordpress.org/WordPress_in_Your_Language
http://codex.wordpress.org/Installing_WordPress_in_Your_Language
How to reorder posts
- Install and activate this plugin: https://wordpress.org/plugins/post-types-order/
- It adds "reorder posts" button for all posts and custom post types and you can manually reorder them.
SCSS file
If you are familiar with coding and need to make changes with SCSS file this plugin
can be used: https://wordpress.org/plugins/happy-scss-compiler/. For small CSS changes and customization it is recommended to use CSS file in child theme
or CSS filed in Customizer.
Favicon
Upload favicon in appearance/customize/site identity/site icon. Official documentation: https://codex.wordpress.org/Creating_a_Favicon
Plugins
Rt Appaira Theme Functions plugin - theme functions and custom post types plugin, bundled with theme.
TGM plugin bundled with theme.
http://tgmpluginactivation.com/
Elementor page bulder plugin.
https://wordpress.org/plugins/elementor/
Advanced custom fields plugin.
https://wordpress.org/plugins/advanced-custom-fields/
Contact form 7 plugin.
https://sr.wordpress.org/plugins/contact-form-7/
Breadcrumbs plugin.
https://wordpress.org/plugins/breadcrumb-navxt/
Events plugin.
https://wordpress.org/plugins/the-events-calendar/
Latest posts plugin.
https://wordpress.org/plugins/latest-posts/
Safe svg plugin.
https://wordpress.org/plugins/safe-svg/
Sources and credits
TGM plugin activation https://github.com/thomasgriffin/TGM-Plugin-Activation
All free plugin mentioned above from WordPress respository.
Bootstrap css framework,
Font Awesome font icons,
tiny-slider.js,
bootstrap.js,
Google fonts,
jQuery.js,
imagesloaded.js,
isotope.js,
magnific popup.js,
Demo images credit
Images are not included for download. Images are slightly transformed to fit design.
Images and icons credit: https://elements.envato.com/
Perks icons created by cube29 - Flaticon
Perks icons created by Iconjam - Flaticon